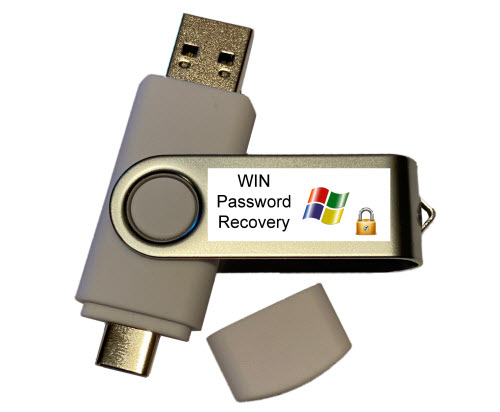
Windows/Linux Password Reset Cracker LIVE USB
>> Instructions and Details <<
(Click or Tap to expand)
- Insert the USB Thumb Drive into a USB slot on your computer.
- Turn On/Restart the computer and immediately start tapping the Boot Media Key (If it continues to boot into the operating system – turn off/restart the computer and try again.): > Boot Media Key: On different computer brands, there will be a different key for triggering the boot menu: Usually it's "F1," F2," F10," "Del" or "Esc.", here is the list of common brands and the corresponding boot menu keys:
- Once the boot menu comes up, select the USB option and press Enter.
Typical boot menu will look something like this.


 * Immediately if it shows: “Press any key to boot from USB” during which you have several seconds to press any key to continue - please observe the computer screen if it happens, if it continues to boot into operating system - restart the computer and try again.
Booting with the USB

>> ACER: Esc, F9, F12
>> Apple: INTEL CPU: Turn on the computer and immediately hold Option/Alt key | APPLE CPU: Turn on the computer and keep holding power button, release when startup options screen appears.
* If mac continues to boot with no boot menu appearing: Boot into "Startup Security Utility" settings by restarting the mac and immediately holding Command+R, then switch "Secure Boot" to "No Security" and "Allowed Boot Media" to "Allow booting from external or removable media":

>> ASUS: Esc, F8
>> COMPAQ: Esc, F9
>> DELL: F12
>> EMACHINES: F12
>> GATEWAY: F10 or ESC, then F10 (To get into BIOS: ESC > Del)
>> HP: Esc, F9
>> IBM LENOVO: F12 (or Fn+F12), F10, F8
>> INTEL: F10
>> NEC: F5
>> PACKARD BELL: F8
>> SAMSUNG: Esc, F12
>> SONY: F10, F11
>> TOSHIBA: F12
* If it will simply not boot with some sort of an unknown/weird error - it could be a one time glitch, turn off the computer and try again.
- Boot into BIOS/UEFI: Turning On/Restart the computer and immediately start tapping the BIOS Setup Key > BIOS Setup Key: Similar to Boot Media Key, BIOS Setup Key is different depending on the computer brand. Usually, you will see which key it is during the BIOS splash screen (on the bottom or top of the screen), which is the very first thing that will appear on the monitor when computer is turned on/restarted.
-
Once inside the BIOS/UEFI setup and configuration section, you’ll be presented with a number of options and parameters that can be configured for the firmware environment. The option you’re looking for has many names, depending on the make and model of the PC or laptop and the EFI firmware. Here is a list of common/typical settings, which need to be turned on to enable Legacy Mode:
>> Legacy Support: "On" or "Enabled"
>> Legacy CSM: "On" or "Enabled"
>> UEFI/Legacy Boot: "Both" or "Legacy Only"
>> Boot Mode: "Legacy Support"
>> Boot Option Filter: "UEFI and Legacy" or "Legacy Only"
- When exiting BIOS/UEFI, make sure configuration options are saved.
![]() If USB boot device is missing from boot menu - enable "Legacy Boot Mode"
If USB boot device is missing from boot menu - enable "Legacy Boot Mode"
> If it is not displayed, usually it's: F1, F2, F8, F12 or Del key, here is the list of common brands and the corresponding BIOS Setup keys:
>> ACER: F2, Del
>> ASUS: F2, Del
>> COMPAQ: F1, F2, F10, DEL
>> DELL: F2, F12
>> EMACHINES: F10
>> GATEWAY: F1, F2, ESC > Del
>> HP: Esc, F10
>> IBM LENOVO: F2 (or Fn+F2), F1
>> INTEL: F2
>> NEC: F2
>> PACKARD BELL: F2
>> SAMSUNG: F2
>> SONY: F2
>> TOSHIBA: F2


![]() If USB boot device is still missing from the Boot Menu - check to see if USB Booting is turned off completely and turn it on.
If USB boot device is still missing from the Boot Menu - check to see if USB Booting is turned off completely and turn it on.
![]() If you are getting "Verification failed: (0x1A) Security Violation":
If you are getting "Verification failed: (0x1A) Security Violation":

- Press OK, Press any key to perform MOK management > Enroll key from disk > YUMI > ENROLL_THIS_KEY_IN_MOKMANAGER.cer > Continue > Yes > Reboot and try again.
- If still not booting - try turning off "Secure Boot" in BIOS, restart the computer and try booting with the USB again.
Once booted with the USB - you should see a menu where you can navigate with Arrow Keys/Enter to select and boot with the desired Operating System or Utility:


- BOOTABLE TOOLS:
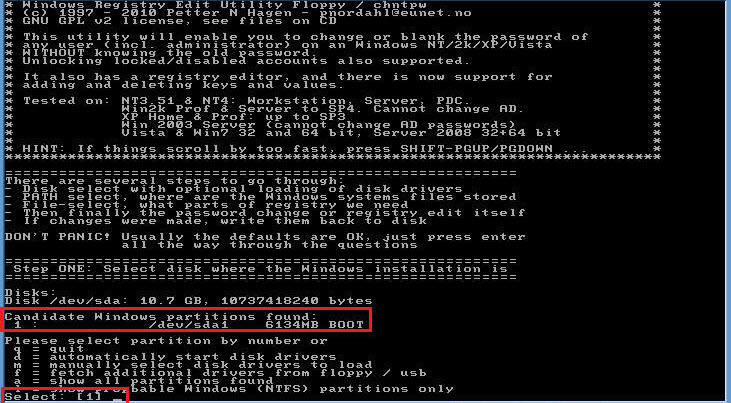
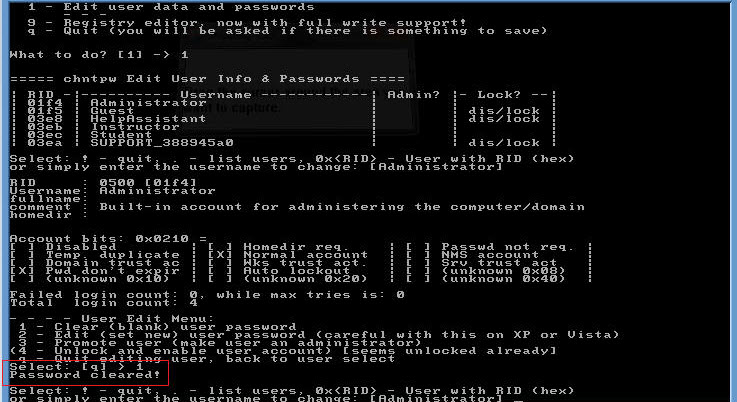
- Windows Password Hacker (Windows 7/10/11) (Once it fully boots it will find all windows partitions (usually it is just 1) > “1”)
- • Type: “1” and hit Enter
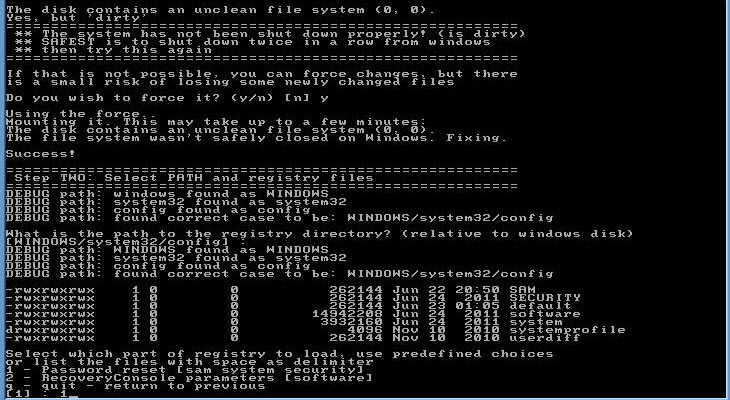
- • Type “1’ again and hit Enter again (Password reset)
- • Type “1” once again and hit Enter again
- • Now you should see all the accounts, including yours, each account has corresponding RID code for it, type in the RID code next to the account you wish to clear and hit Enter
- • Select the corresponding option you wish to perform with the account. If you simply forgot your password, it’s best to select “1” option to clear the password, so you can login. Once you login you can set a new password.
- • You should see response “Password cleared!”
- • Restart your computer (you can simply turn it off/on by the power button
- • Give it a few minutes during start up (on older computers it may take 5-10+ minutes) at login please as it will look like you need to enter the password, but eventually it will login through the initial screen without the need of entering password!
- System Rescue (Linux Password Hacker) (NOTE: This will require some Linux command-line knowledge)
- • su – root
- • lvdisplay
- o o Locate the root logical volume, for example: /dev/vg/root
- • mkdir /mnt/root
- • mount /dev/vg/root /mnt/root
- • chroot /mnt/root /bin/bash
- • passwd root
- o o You will be prompted to enter a new password
- • exit
- • reboot
- o o If you get lost with the command line, you can launch GUI interface by command: startx
- NON-BOOTABLE TOOLS:
- ophcrack
- • Launch ophcrack app via Run as administrator
- • Click on Load > Local SAM with samdumnp2 (NOTE: On some Windows 10 versions it won’t
- • Select the account
- • Hit “Crack”
- Windows10-Password-Reset-Guide.pdf
- • This is a full guide on how to reset/clear Windows 10 (should work on Windows 7, may work for 11 as well) password
- Compatible with the following Windows Operating Systems:
- Windows 2000
- Windows XP 32bit / 64bit
- Windows Vista 32bit / 64bit
- Windows 7 32bit / 64bit
- Windows 7 SP1 32bit /64bit
- Windows 8 32bit /64bit
- Windows 8.1 32bit /64bit
- Windows 10 32bit /64bit
- Windows 11
- System requirements:
- PC Computer (any brand) with USB 2.0 / 3.0 port which can boot with USB drive
- Bootable USB ability only needed for bootable tools
- NO internet connection required, everything you need is on the USB drive!
*** Sometimes you may need to adjust your BIOS settings to allow booting with USB!
Windows/Linux Password Reset and Recovery
Data Restore and Recovery
Operating System Restore and Recovery
You may be also interested in:
> Memory and USB Drive Storage Organizer Case - Plastic - Carry Handle - 24 USB slots
> Memory and USB Drive Storage Organizer Case - Plastic - Carry Handle - 16 USB, 2 HDD slots
> Memory and USB Drive Storage Organizer Case - Wood - Key Lock - 12 USB slots
> Memory and USB Drive Storage Organizer Case - Aluminum - Combination Lock - 12 USB slots
> Memory and USB Drive Storage Organizer Case - Aluminum - Combination Lock - 24 USB slots, 2 HDD slots
> Memory and USB Drive Storage Organizer Case - Aluminum - Combination Lock - Carry Handle - 24 USB slots, 2 HDD slots
> Memory and USB Drive Storage Organizer Case - Aluminum - Combination Lock - Carry Handle - 48 USB slots
> Memory and USB Drive Storage Organizer Case - Aluminum - Combination Lock - Carry Handle - 48 USB slots - 6 RAM strips
> Memory and USB Drive Storage Organizer Case - Aluminum - Combination Lock - Carry Handle - 130 USB slots
> Memory and USB Drive Storage Organizer Pouch Case - Waterproof with Ziplock - Designed to fit 3-ring Binders
> Memory and USB Drive Storage Organizer Foam Case - 14 USB, 8 IDE HDD, 2 microSSD slots
> CAINE Computer IT Digital Forensics Investigation Utility - Bootable Live USB
> HDD Hard Drive Eraser - Permanent Data Destruction - Bootable USB
> Computer IT Restore and Repair Antivirus Data Recovery Password Reset Drivers and Utilities Bootable Live USB
> Linux Mint Cinnamon Operating System - Just like Windows - Bootable Live OS USB
> Linux Tails Operating System - Use The Internet anonymously and Circumvent - Bootable Live OS USB
> Linux Kali Operating System - Ethical Hacking and More - Bootable Live OS USB
> Universal Linux Operating Systems 6-in-1 Multi-Boot Bootable Live OS USB
> Linux Ubuntu Desktop/Server Operating System Bootable Live OS USB
> Windows Password Reset and Data Recovery Bootable Live USB
